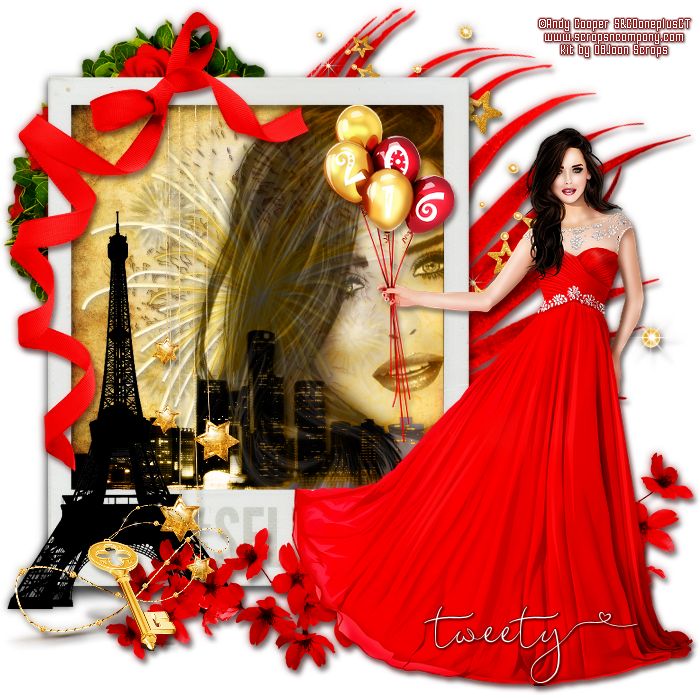
SELFIE TUTORIAL
Tutorial written by Marcia Salgado on January 30th, 2016
for those who have a working knowledge of PSP.
I'm using PSP9 to create my tuts.
Any resemblance to any other tutorial is coincidental.
Do not copy and paste this tutorial anywhere on the net.
If you want to translate please ask first.
****************************************
Material:
Tube: "Balloons 2016" by Andy Cooper, you can purchase it here
do not use without the proper #license.
PTU Kit "Balloons 2016" by DBJoan Scraps, you can purchase it here
Font: featherly
****************************************
--> Remember to save often and use my tag as reference if necessary. Use a Drop Shadow of your preference on layers.
1. Create a new image 700x700.
2. Open BALLOONS 2016_DBJ- (53). Resize 80%. Flip. Copy and paste as new layer. Move it up and left. Place it on top left corner.
3. Open BALLOONS 2016_DBJ- (103). Free Rotate: Right-15. Copy and paste as new layer. Move it a little up and a little to right.
4. Open BALLOONS 2016_DBJ- (4). Resize 65%. Copy and paste as new layer. Move it up and to right.
5. Open BALLOONS 2016_DBJ- (2). Copy and paste as new layer. Move it up and to left.
6. Select inside the frame. Expand > 5. Add a new layer and move it below frame layer. Open BALLOONS 2016_DBJ-PP (5). Copy and paste into selection. Deselect.
7. Open BALLOONS 2016_DBJ- (26). Resize 50%. Copy and paste as new layer. Move it inside the frame on top. Blend Mode: Luminance (Legacy).
8. Open BALLOONS 2016_DBJ- (1). Copy and paste as new layer. Move it inside the frame on top.
9. Open BALLOONS 2016_DBJ- (54). Resize 50%. Copy and paste as new layer. Move it inside the frame on bottom. Blend Mode: Luminance (Legacy).
10. Select inside the frame again. Expand > 5. Open your tube close up. Resize if needed. Free Rotate: Left-8. Copy and paste as new layer. Place only half of the face inside the frame. Invert selection. Delete. Select all. Clip to Canvas. Crop to selection. Blend Mode: Luminance (Legacy). Low the layer opacity to 64. Duplicate. Gaussian Blur: 4. Blend Mode: Soft Light.
11. Open BALLOONS 2016_DBJ- (49). Resize 75%. Copy and paste as new layer, Move it down and to left.
12. Open BALLOONS 2016_DBJ- (71). Resize 65%. Copy and paste as new layer. Move it down and to right.
13. Open BALLOONS 2016_DBJ- (101). Resize 65%. Copy and paste as new layer. Move it up and to left and place it hanging from the top of the frame.
14. Open BALLOONS 2016_DBJ- (3). Resize 75%. Mirror. Copy and paste as new layer. Move it up and way to left. Place it over the left side of the frame a little over the hanging stars strings.
15. Open your tube. Resize if needed. Copy and paste as new layer. Move it down and to right.
16. Open BALLOONS 2016_DBJ- (32). Resize 45%. Copy and paste as new layer. Move it down and to left. Place it over the Eiffel Tower at bottom.
--> Add your copyright info and license #. Add your name and save as PNG.

